Spring is here, and Easter is just around the corner! It's the perfect time to add festive cheer to your home with colorful decorations celebrating the season. The best part? You don't need to spend a fortune on store-bought décor when you can create beautiful pieces with simple materials you probably already have at home.
We've rounded up some of our absolute favorite kid-friendly Easter DIY projects that are sure to bring smiles all around. These crafts are perfect for little hands (with some grown-up help where needed) and will turn your home into an Easter wonderland!
Hanging Egg Ornaments
Transform ordinary eggshells into magical hanging ornaments for your Easter tree!
What You’ll Need:
- Empty eggshells (carefully cracked and cleaned)
- Ribbons
- Superglue or hot glue
- Small flowers, candies, or decorative moss
How-To:
- Carefully crack the top of the eggshell to create an opening and empty the contents.
- Wash and let the shells dry completely.
- Attach a ribbon to the bottom of the shell using glue, creating a loop for hanging.
- Add tiny flowers, candies, or even small toys inside the shell.
- Hang them on branches arranged in a vase for a stunning Easter tree centerpiece.
Salt Dough Bunny Ornaments
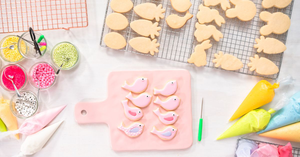
Salt dough crafts are always a hit with kids! These bunny-shaped ornaments are easy to make and can be painted in bright colors.
What You’ll Need:
- 2 cups plain flour
- 1 cup salt
- 1 cup water
- Bunny-shaped cookie cutters
- Acrylic paint
How-To:
- Mix flour, salt, and water to form a dough.
- Roll out the dough and use cookie cutters to create bunny shapes.
- Make a small hole at the top of each shape if you want to hang them later.
- Bake at 140°C (120°C fan) for 2–3 hours until hard.
- Once cooled, paint them in pastel shades or add patterns like polka dots.
Washi Tape Easter Eggs
Decorating Easter eggs has never been easier—or less messy!
What You’ll Need:
- Hard-boiled eggs or plastic eggs
- Washi tape in various colors and patterns
- Scissors
How-To:
- Cut strips of washi tape and stick them onto the eggs in creative patterns—stripes, zigzags, or even patchwork designs.
- Let kids mix and match their favorite tapes for unique designs.
- Display them in a basket or use them as table decor.
Egg Garlands
Turn colorful eggs into festive garlands that can be strung across windows or walls.
What You’ll Need:
- Plastic Easter eggs
- Yarn or string
- Small drill (optional)
How-To:
- Drill small holes on both ends of each plastic egg (or use pre-drilled ones).
- Measure the fishing line or string to your desired length, adding an extra 12 inches for tying.
- Thread the fishing line through the top holes of each plastic egg.
- Leave about six inches between each egg and tie a knot to keep them in place.
- Continue threading until all eggs are on the garland.
- Tie a tight knot after the last egg and use the extra line at both ends to create loops for hanging.
Pro tip: If using real eggs, make sure to blow them out first (parents, this is your job!).
Fresh Flower Wreath
Add a touch of springtime elegance with a fresh flower wreath. This makes a gorgeous front door decoration that celebrates the season's renewal. Kids love arranging the flowers and creating patterns!
What You’ll Need:
- A foam wreath base
- Fresh flowers (like daisies, tulips, or baby’s breath)
- Floral wire
How-To:
- Wrap floral wire around the stems of fresh flowers and attach them to the base.
- Continue layering flowers until the base is fully covered.
- Hang it on your front door or above your fireplace for a natural and vibrant display.
3-D Paper Easter Eggs
Whether you’re decorating an Easter tree, setting up your table, or adding festive touches to your mantel, these eggs are easy to make and perfect for kids and adults alike.
What You’ll Need:
- Scrapbook paper
- Scissors
- Glue stick
How-To:
- Start by cutting out multiple identical egg shapes from cardstock. You’ll need at least 5–6 layers of the same size to create a full 3-D effect.
- Carefully fold each egg shape in half lengthwise. This creates the symmetry needed for the 3-D design.
- Take one folded egg shape and apply glue to one side of its flat surface. Attach another folded egg shape on top of it, aligning the edges carefully. Repeat this process until all the layers are glued together, forming a circular shape.
- Once all layers are glued together, gently open up the stack to reveal your 3-D egg! Adjust it as needed to ensure it looks symmetrical and full.
Rice-Shaken Easter Eggs
This simple craft is perfect for kids of all ages. Plus, it’s less messy than traditional dyeing methods, making it a favorite for parents.
What You’ll Need:
- Hard-boiled or plastic eggs (white eggs work best for vibrant colors)
- Uncooked rice
- Food coloring in various shades
- Small plastic containers or zip-lock bags
- Gloves (optional, to avoid dyed fingers)
How-To:
- Add about 1/4 cup of rice to a small plastic container or zip-lock bag.
- Drop 10–15 drops of food coloring into the rice.
- Close the container or bag tightly and shake until the rice is evenly coated with color.
- Repeat the process with different containers or bags for each color you want to use.
- Place an egg into the container with the colored rice.
- Close the lid tightly and shake the container gently but thoroughly, flipping it over occasionally to ensure the egg gets an even coat of speckles.
- Remove the egg from the container and let it dry completely.
- If you want multi-colored speckles, repeat the process by placing the egg into another container with a different color of rice.
- Shake again and let dry.
Ribbon-Tied Eggs
Whether you use plastic eggs or real ones, this craft is perfect for creating festive table settings, hanging ornaments, or decorative baskets.
What You’ll Need:
- Plastic Easter eggs or hard-boiled eggs
- Ribbons (choose pastel or patterned designs for a spring vibe)
- Scissors
- Glue (hot glue works best for plastic eggs)
- Optional: Fray Check to prevent ribbon edges from fraying.
How-To:
- Choose ribbons that complement the color of your eggs. Cut each ribbon to about 18–24 inches, depending on the size of your egg. If you want to tie bows, make sure the ribbon is long enough to allow for extra loops.
- Start by placing the middle of the ribbon at the bottom of the egg. Bring both ends up over the sides and cross them at the top. Continue wrapping until you return to the bottom, creating a crisscross pattern around the egg.
- For plastic eggs, use a dab of hot glue at the bottom or top of the egg to hold the ribbon in place. For real eggs, tie a knot or bow at the top without glue so they remain food-safe.
- You can enhance your ribbon-tied eggs with additional embellishments: tie small bows at the top for a polished look, add tiny flowers, beads, or charms to the ribbon for extra flair, or use multiple ribbons in different colors for a layered effect.
Conclusion
Making Easter decorations together creates wonderful family memories while beautifying your home. Don't stress about perfection—the joy is in the creating!




Be the first one to comment on this story.